Setting up Brunch ChromeOS

Introduction
At present there a few methods to run ChromeOS on a device. If you have a Chromebook or Chromebox, the experience will be based on the official ChromeOS image provided by Google. For those without access to this type of device, there are other options. In this blog post learn how to use Brunch as one of those options.
NOTE: Brunch is an unofficial product, so use with caution.
Running ChromeOS via Brunch can be achieved by using a recovery image on a compatible machine. While Brunch is the focus of this blog post, there are actually a few alternatives if you want to run ChromeOS.
| Option | Overview | Audience |
|---|---|---|
| Brunch | Based on official x86_64 ChromeOS image | Experienced |
| Neverware CloudReady | Based on the open source ChromiumOS image | Inexperienced |
A predominate reason to use Brunch is that it is very close to the ChromeOS released by Google. The image will include the Google Chrome browser(rather than Open Source Chromium) and include access to Android Apps. Hopefully Googles purchase of Neverware will mean we start to see greater feature parity going forward.
Hardware Compatibility
It is important to check the compatibility of the machine on which Brunch will be run.
For this blog post example, a recovery image for the ASUS Chromebox 2 (CN62 aka Guado) is used.
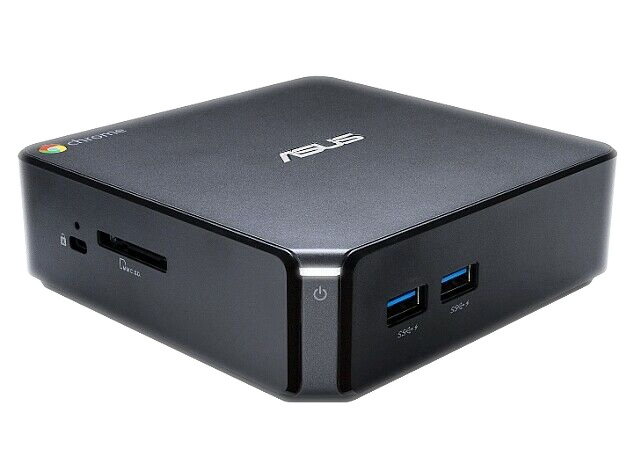
The Asus Chromebox 2 (aka Asus CN62/Guado) is end of ChromeOS life (EOL June 2021).
NOTE: Chrome EOL just means the device is not getting any further official updates. The device is still usable and can be repurposed e.g. Linux/Windows/ChromeOS etc! Converting a machine is beyond the scope of this blog post but further details can be found here.
There are a lot of these machines are available on Ebay e.g. an Intel i7 machine should cost less than $200. A machine like this is a good investment if you like to play with software.
Recovery images for other devices can be viewed at these links:
Create the ChromeOS Image
In the following section the most recent Guado image is used. If you are using a different type of device substitute the correct image to follow along.
Download a Recovery Image
Download a recovery image supported by the device. Multiple types of release channel exist e.g.
- Stable
- Beta
- Dev
- Canary.
Additionally each release channel will have a release candidate identified by a number. In this section the stable release 89 has been selected as the installation candidate. The release candidate will vary by device and channel, so feel free to experiment.
- Download a Recovery images
e.g. ChromeOS Guado r89
- Extract the recovery image to the current directory e.g.
1unzip chromeos_13729.56.0_guado_recovery_stable-channel_mp-v2.bin.zip
Download a Brunch release
Brunch release candidate are aligned with the recovery image. Meaning we should look for a Brunch release with a similar revision to the recovery image used.
- Download the corresponding Brunch release
e.g. Brunch r89 stable
- Extract the Brunch files to the current directory e.g.
1tar -xvf brunch_r89_stable_20210403.tar.gz
Create the ChromeOS image
After downloading the Recovery image and Brunch release candidate, the image can now be created.
- The directory contents should now be similar to the following:
1.
2├── brunch_r89_stable_20210403.tar.gz
3├── chromeos_13729.56.0_guado_recovery_stable-channel_mp-v2.bin
4├── chromeos_13729.56.0_guado_recovery_stable-channel_mp-v2.bin.zip
5├── chromeos-install.sh
6├── efi_legacy.img
7├── efi_secure.img
8└── rootc.img
- Set the ChromeOS image
1image="chromeos_13729.56.0_guado_recovery_stable-channel_mp-v2.bin"
- Create the ChromeOS image
1sudo bash chromeos-install.sh -src $image -dst chromeos-v89-guado.img
NOTE: The file names are based on the downloaded images
Installation to USB
Create a Live boot version of ChromeOS to test against your device.
Write to USB
The USB stick with the ChromeOS image can be used as a live boot device.
-
Insert a USB stick (>= 16GB)
-
Create a bootable disk with disk writer software e.g. balenaEtcher
-
Restart the machine and boot from USB flash drive (
May need to amend BIOS to boot from flash drive) -
The software should boot from the USB flash drive and give you access to ChromeOS
Test the USB
Write the image to the USB stick and test the image has been successfully created.
- Boot device
- Login
- Configure the machine
- Test ALL aspects of the system
Test the operating system to ensure it is running as specified. Once confirmed, the OS can optionally be written to the Hard Disk.
NOTE: System updates should be performed using the Brunch, rather than system updates.
Upgrade Brunch
-
Open a Cros Shell -
Ctrl-Alt-T -
Type
shell -
Check the version of Brunch on the device
1cat /etc/brunch_version
- Download the ChromeOS recovery image e.g. /tmp/chrome_r8.bin.zip
- Extract the recovery image e.g. /tmp/chrome_r8.bin
- Download the Brunch release that corresponds to the ChromeOS recovery image e.g. /tmp/brunch_r98
- Run the ChromeOS Update
1sudo chromeos-update -r /tmp/chrome_r8.bin -f /tmp/brunch_r98
- ChromeOS will state the update is to be performed
- Restart ChromeOS