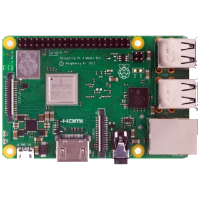
RPi Base Image

RPI Create Image
Debian installation on RPI
A quick overview of how to build a image.
Bill of materials
- Raspberry Pi x 1
- MicroSDHC Card (Minimum 8GB)
- USB Charging Cable (Same amount as RPi)
- Machine to creating a RPi Disk Image
Create the Disk Image
- Download a Raspberry PI image e.g. Raspbian Debian Image
- Take the Memory Card and install an operating system.
-
Download either torrent or the zip file to your machine Note: the location where the file is being downloaded
-
Insert the memory card into your host machine and confirm it is recognised.
-
Take note of how the memory card is labelled as we will use this information later
-
Locate the downloaded file on your host.
-
Extract the file to an image file
-
Right click on the downloaded image to show the menu
-
Open with Disk Image Writer option.
-
In the image writer, select the memory card inserted to be used to write the image.
Configure the Image
Once the image has been written to the memory card there will be two volumes available:
- boot
- rootfs
NOTE: On ChromeOs
- share the folders with Linux to
- enable write access
- look in the folder
/mnt/chromeos/removable
- Select the BOOT from the file manager:
Click on the boot folder to mount the image. Then right click in the folder window and select the “open in terminal” option.
In the Terminal window for the boot folder add a SSH file to the root of the boot folder
1touch ssh
This ensure the SSH service is started
Close the open terminal window
Note: You can also change the hostname ...
- Select the ROOTFS from the file manager:
Click on the rootfs folder to mount the image. Then right click on the folder window and select the “open in terminal” option
In the Terminal window for the rootfs folder. Enter the config directory
1cd etc
Edit the hostname file (use whatever editor you like)
1sudo vi(m) hostname
Change the hostname from the default raspberrypi to whatever you want - save the file
You can now eject the rpi filesystem (i.e. boot & rootfs) mounts using the file manager